WSL
What is WSL?
The Windows Subsystem for Linux lets developers run a GNU/Linux environment -- including most command-line tools, utilities, and applications -- directly on Windows, unmodified, without the overhead of a virtual machine or dual boot setup.
See complete overview WSL
Why WSL
WSL is a easy way to learn, understand and develop on linux without any need to spend time installing linux in your host machine, the process to install and use is simple and you can use most of the host resources, share files and tools between windows and Linux.
If we compare with Linux running directly host, we will have lower performance in WSL than the same distribution running directly on host, this is expected as WSL is running virtualized on top of windows and sharing resources between both OS.
We choose WSL for starting point, as you will see how easy is to start working in Linux following the steps described in next chapters.
Start with WSL
WSL have 2 different versions WSL1 and WSL2, we will use WSL2 as this version is already tested for AGL.
Starting installation is simple you just need open CMD, powershell or Terminal windows go with either one of the options below:
a) Use specific distribution
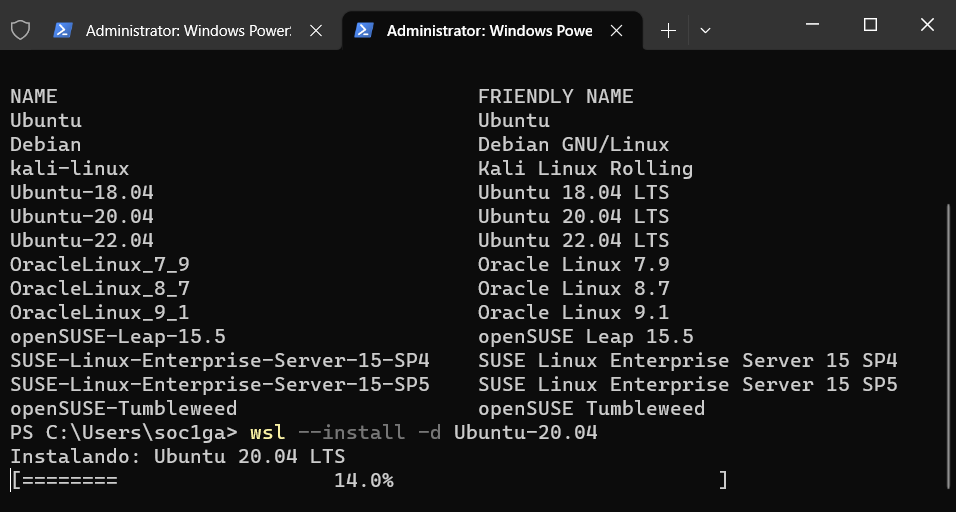
First check the available distribution using below command
wsl --list --online

Then type below command to install Ubuntu-20.04
wsl --install Ubuntu-20.04

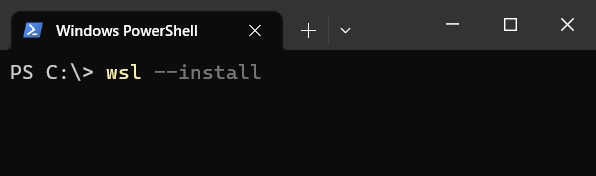
b) Use Ubuntu by default then type this command
wsl --install
See official page for more details.
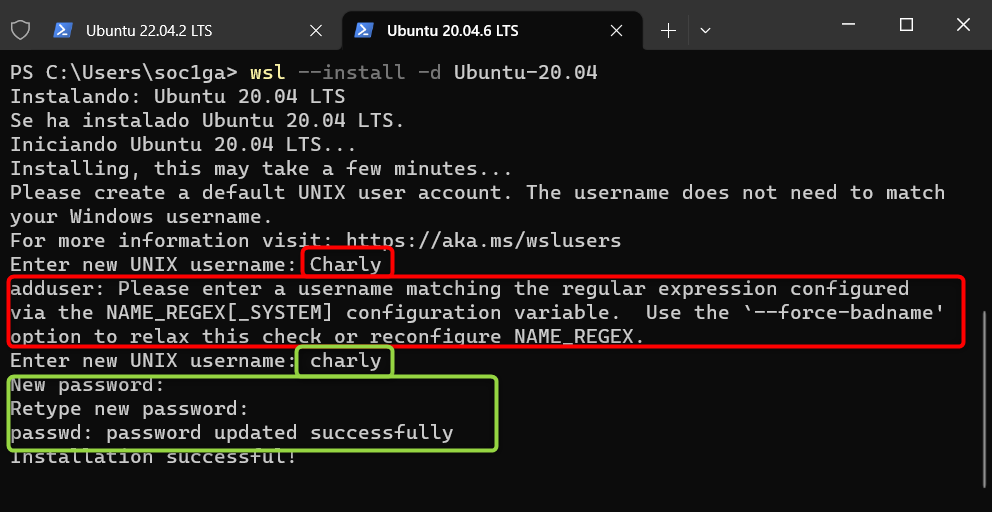
After previous commands you will see the installation progress like this
Once this process completes you need provide user and password, for user name use lowercase, if you use uppercase for user will get an error like in the red rectangles. Accepted entry will ask for password again, then installation will be completed.
WSL Configuration
WSL use 2 files to set it's own configuration, the complete description of each configuration is available at this place: wsl-config
1.- Internally to our Ubuntu \etc\wsl.conf, please create this file and add the below text
wsl.conf content:
# Set a command to run when a new WSL instance launches.
[boot]
systemd=true
2.- Externally in Windows C:\Users\your-user.wslconfig .wslconfig content: NOTE: memory, processors and swap options need to be adapted base on your PC
# Settings apply across all Linux distros running on WSL 2
[wsl2]

# Memory to assign to the WSL2 should not excede 80% of total RAM memory
memory=12GB

# How many processors to assign to the WSL2
processors=8

# Sets amount of swap storage space, default is 25% of available RAM
swap=8GB

# Sets swapfile path location, default is %USERPROFILE%\AppData\Local\Temp\swap.vhdx
swapfile=C:\\temp\\wsl-swap.vhdx

# Disables nested virtualization
nestedVirtualization=true

# Turns on output console showing contents of dmesg when opening a WSL 2 distro for debugging
debugConsole=false

#Boolean to turn on or off support for GUI applications (WSLg) in WSL.
guiApplications=true
Now restart WSL with this command in windows terminal and after 8 second open new terminal
wsl --shutdown
First Command in WSL
Open Ubuntu terminal in your windows OS and we will start to use our distribution
Update all components from Ubuntu distro and upgrade the system
sudo apt-get --assume-yes update && apt-get --assume-yes upgrade && apt-get clean
Install some useful packages
sudo apt-get --assume-yes install curl nano wget apt-transport-https ca-certificates rsync filepp device-tree-compiler cmake libgtest-dev google-mock gcovr lcov pandoc mc texlive-fonts-recommended texlive-latex-recommended libc6-dev libxml2-dev libicu-dev git-core gnupg flex bison gperf build-essential zip curl zlib1g-dev gcc-7-multilib g++-7-multilib x11proto-core-dev libx11-dev ccache tofrodos gawk ant libxml2-utils libgl1-mesa-dev xsltproc unzip libssl-dev liblz4-tool openjdk-8-jdk libc6-dev-i386 lib32z-dev bc gettext u-boot-tools libjson-perl libterm-readkey-perl libmime-lite-perl libarchive-zip-perl libtext-glob-perl xmlstarlet jq adb fastboot sloccount dstat android-sdk-libsparse-utils android-sdk-ext4-utils python3.7 libncurses5 gawk wget git diffstat unzip texinfo gcc chrpath socat cpio python3 python3-pip python3-pexpect xz-utils debianutils iputils-ping python3-git python3-jinja2 libegl1-mesa libsdl1.2-dev pylint3 xterm python3-subunit mesa-common-dev
Try use the below commands in WSL:
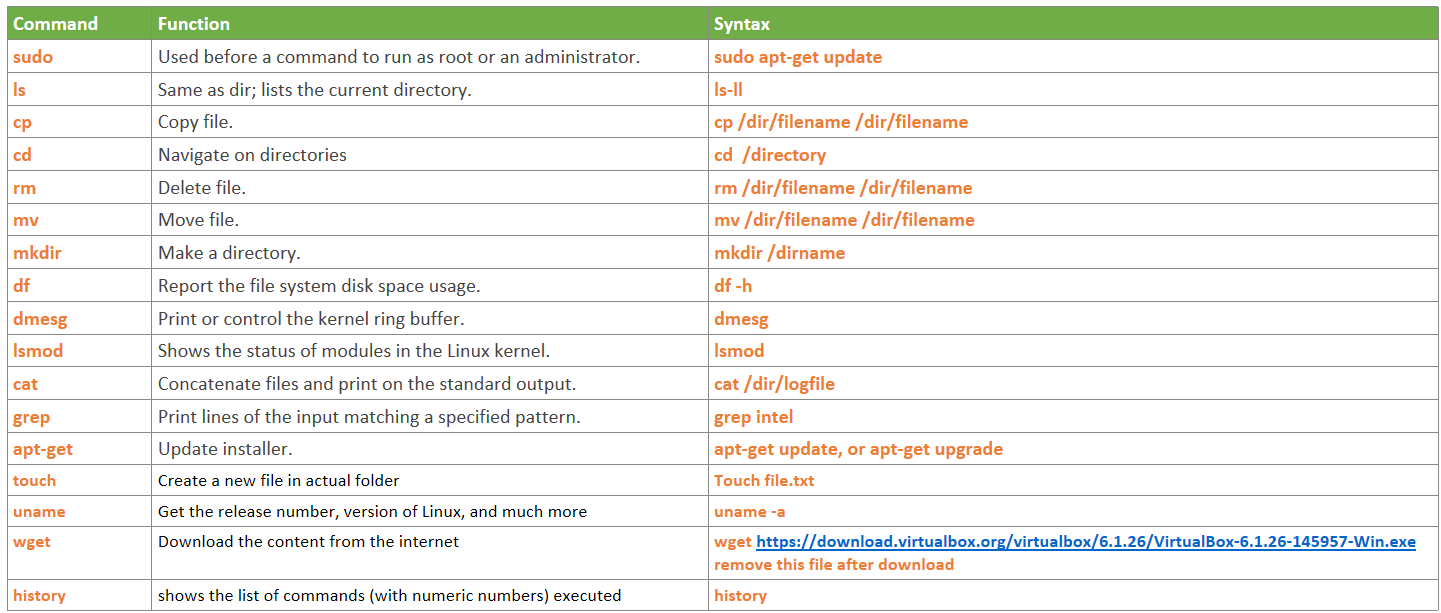
Learn more about Linux command line.
Backup WSL
I recommend after all tool installation and before start work with any project in WSL create a Backup and store it in safe location, in this way you can recover your WSL state, avoiding spending time installing all the tools again. WSL have 2 command for this export and import command
Backup Command:
wsl --export Ubuntu-20.04 path/where/save/backup/Ubuntu-20.04_backup.tar
Backup Recovery Command:
wsl --import Ubuntu-20.04 C:\Users\<username\AppData\Local\Packages\Ubuntu-20.04 path/where/save/backup/Ubuntu-20.04_backup.tar
Alternatives to WSL
In case WSL is not working, you can still use Ubuntu in Virtual box, just follow the Virtual Box installation steps
Warning: virtual machine require minimum 200GB storage space for project, please consider it during storage creation.